Configuring forms based authentication (FBA) in SharePoint 2016 and SharePoint 2019 is exactly the same process as configuring it for SharePoint 2013. I’ve recreated the SharePoint 2013 FBA tutorial specifically for SharePoint 2016 and SharePoint 2019, using screenshots from SharePoint 2016 and Windows Server 2012 R2. I have changed the tutorial to use the SharePoint FBA Pack to create the FBA users, but otherwise it remains the same and can be used interchangeably between SharePoint 2013 and SharePoint 2016/2019.
I’ll go through all of the steps required to setup FBA for SharePoint 2016 and 2019, from start to finish. I’ve broken down the steps into 4 sections, so if you already have an existing membership database setup from a previous version of SharePoint, feel free to skip forward to Part 2.
Part 1 – Creating the Membership Database
Part 2 – Editing the Web.Config Files
Part 3 – Configuring SharePoint
Part 4 – Adding Users to the Membership Database
You can also watch a video of the whole process on YouTube: Configuring Forms Based Authentication in SharePoint 2016 and SharePoint 2019.
Part 3 – Configuring SharePoint
Now that the membership and role provider have been configured, we can configure SharePoint to use them. For this example i’m going to edit an existing web application to use forms based authentication. The same settings can be applied when creating a new web application.
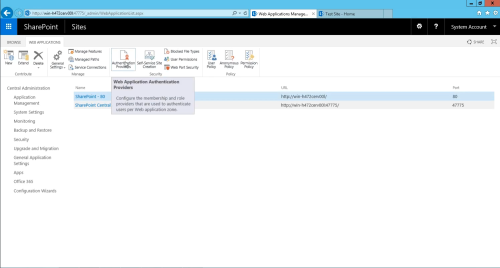
- Open SharePoint Central Administration -> Application Management -> Manage Web Applications.
- Select the web application you’d like to edit and click “Authentication providers”.

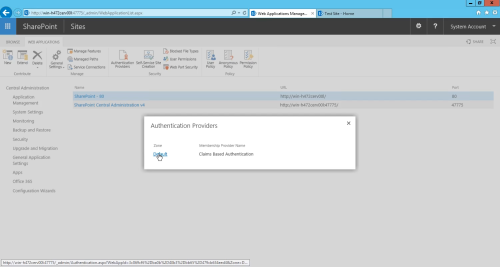
- Select the zone of the authentication provider you’d like to edit. In this case I only have a single zone setup: “Default”. If you like, you can add multiple zones by extending the web application. This will allow you to select different forms of authentication to the same web application depending on the url used to access it. For example if users hit the web application using the local server name, then it can authenticate them with windows authentication. If they access it via an external domain name, you could have it authenticate them with FBA.

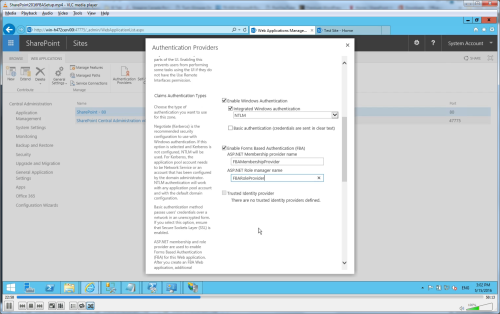
- Check “Enable Forms Based Authentication (FBA)”. Enter the ASP.Net Membership Provider Name and ASP.NET Role Provider Name that you configured in the web.config. For this example we used “FBAMembershipProvider” and “FBARoleProvider” (Without the quotation marks). In this case we left “Enable Windows Authentication” checked. This allows us to login either via Windows Authentication or Forms Based Authentication (SharePoint will prompt you when you login for which method you’d like to use).Click “Save”.

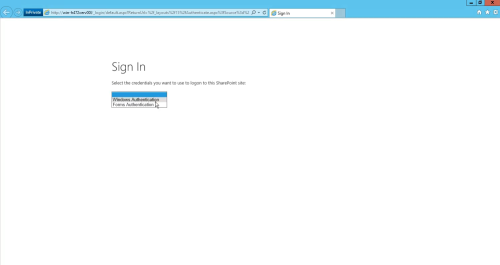
- Now when authenticating to the site collection, if you enabled both Windows Authentication and Forms Based Authentication, you’ll be prompted for which method you’d like to use to authenticate.

At this time however, you still cannot authenticate with forms based authentication, as we haven’t created any users in the membership database. In Part 4 i’ll show you how to use the FBA Pack to add users to the membership database.
Important – Additional Steps for enabling FBA for Office Applications
Thank you to Denis Molodtsov for noticing that even with FBA configured in SharePoint 2016, it still won’t authenticate properly when opening a document from SharePoint with Office 2016 (Word, Excel, PowerPoint…). Office 2016 now uses “Modern Authentication” by default – which does not support Claims authentication. SharePoint 2016 releases from the June 2016 CU and onward allow Modern Authentication to be turned off. To turn it off run the following in the SharePoint Management Shell:
$sts = Get-SPSecurityTokenServiceConfig
$sts.SuppressModernAuthForOfficeClients = $True
$sts.update()
iisreset
Leave a Reply