Configuring forms based authentication (FBA) in SharePoint 2013 is very similar to SharePoint 2010, but there are some differences due to SharePoint 2013 using .Net 4.0. The web.config entries entries are slightly different. As well, IIS doesn’t support editing .Net 4.0 membership provider configuration through the IIS interface, so all of the configuration has to be done directly in the .config files. I’ll go through all of the steps required to setup FBA for SharePoint 2013, from start to finish. I’ve broken down the steps into 4 sections, so if you already have an existing membership database setup from a previous version of SharePoint, feel free to skip forward to Part 3.
Part 1 – Creating the Membership Database
Part 2 – Adding Users to the Membership Database
Part 3 – Editing the Web.Config Files
Part 4 – Configuring SharePoint
Part 2 – Adding Users to the Membership Database
Now that we’ve created an empty membership database, we need to add some users to it that can be used to login. You have a couple of options for doing this. If you’d like to do all of your user management in SharePoint, then you can install the SharePoint 2013 FBA Pack and skip to Part 3. If you’d like to be able to manage the users outside of SharePoint, and setup some inital users, then continue on to learn how to manage the FBA users with IIS.
To manage users in IIS, we’re going to create a dummy site just for managing users. In SharePoint 2010 and earlier it was possible to edit the users directly from a SharePoint web application site, as long as the default membership provider was set to the membership provider you were going to edit. This is no longer possible, as previous versions of SharePoint ran against ASP.NET 2.0 (3.5), but SharePoint 2013 runs on ASP.NET 4.0. IIS does not support editing users and roles for ASP.NET 4.0 applications. To get around this, we’ll create a dummy/blank ASP.NET 2.0 web site just for editing users. The asp.net 2.0 and 4.0 membership databases are exactly the same, which makes this possible.
NOTE: These directions were created on Windows 2008 R2. On Windows 2012 they have reversed things and the .Net Users and .Net Roles options are only available for .Net 4.0 and are not available for .Net 2.0 – So on Windows 2012 please use .Net 4.0 where 2.0 is mentioned in the directions.
- Open IIS.
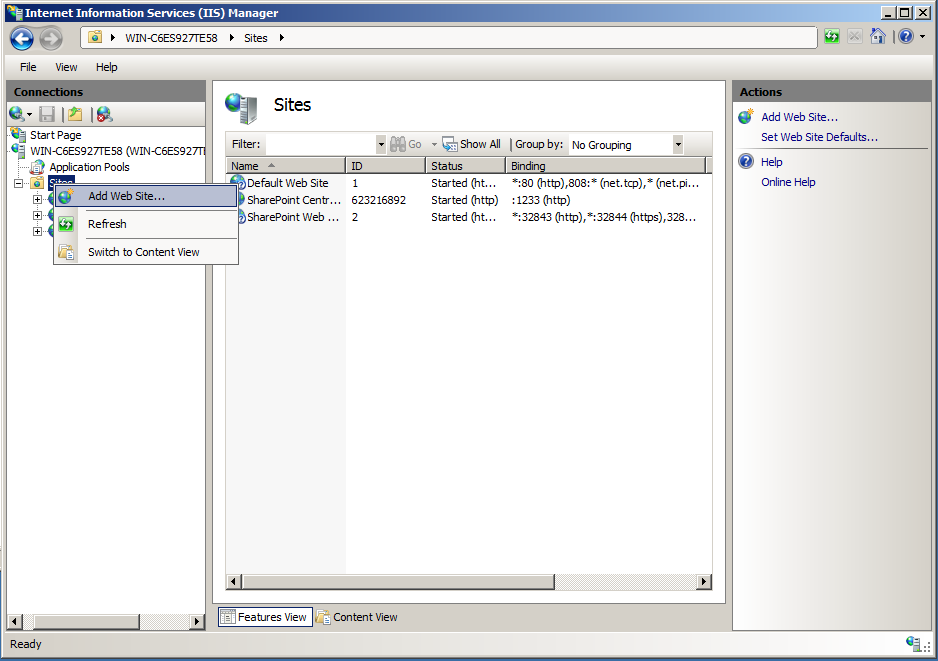
- Right click on Sites and select “Add Web Site…”
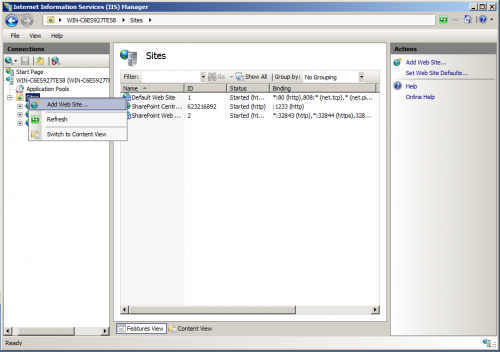
- A configuration dialog will appear. Just give it a meaningful name, point it to an empty folder and give it a random unused port number and click OK.

- Click on “Application Pools”. An application pool of the same name should have been created. The .Net Framework for that application pool should show as “2.0”. If it doesn’t, you’ll need to modify it’s settings and change it to “2.0”.
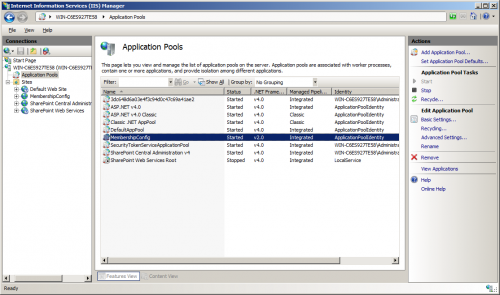
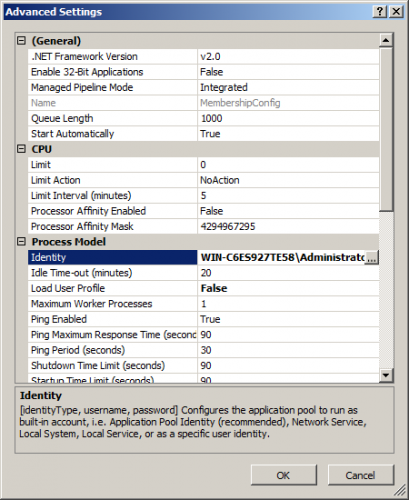
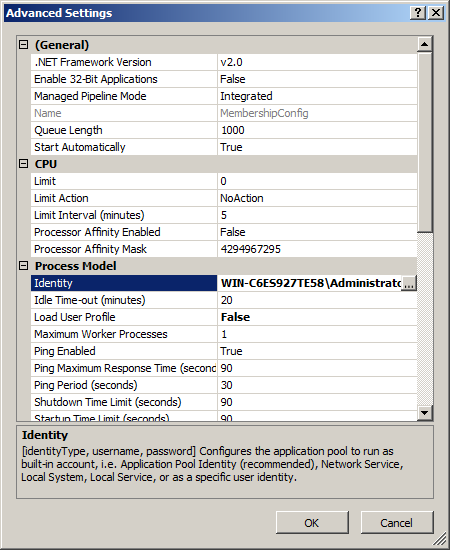
- You’ll also have to set the identity the account runs as to the same as SharePoint, so that it will have permissions to read and write to the membership database. Select the application pool and click “Advanced Settings…” in the right panel. In the dialog that comes up, click on the Identity to change it. Choose “Custom account” and enter the SharePoint service account username and password. Click OK on all of the open dialogs to close them.

- The identity should now match the identity used for the SharePoint application pools.
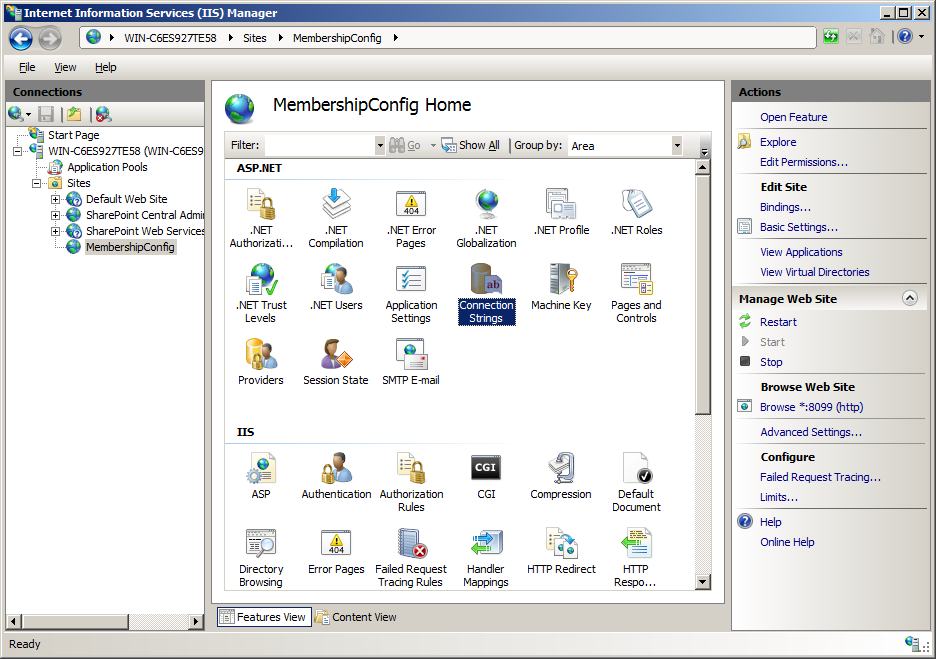
- We’re now going to create a database connection to the membership database. Select your new site and open the “Connection Strings” page from the Features view.
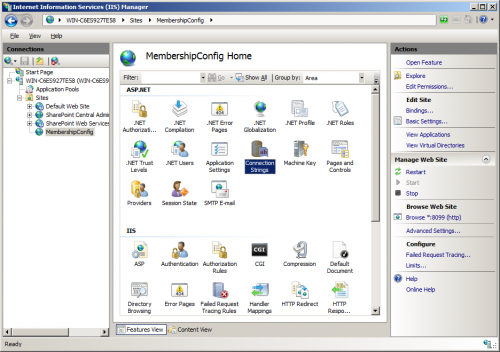
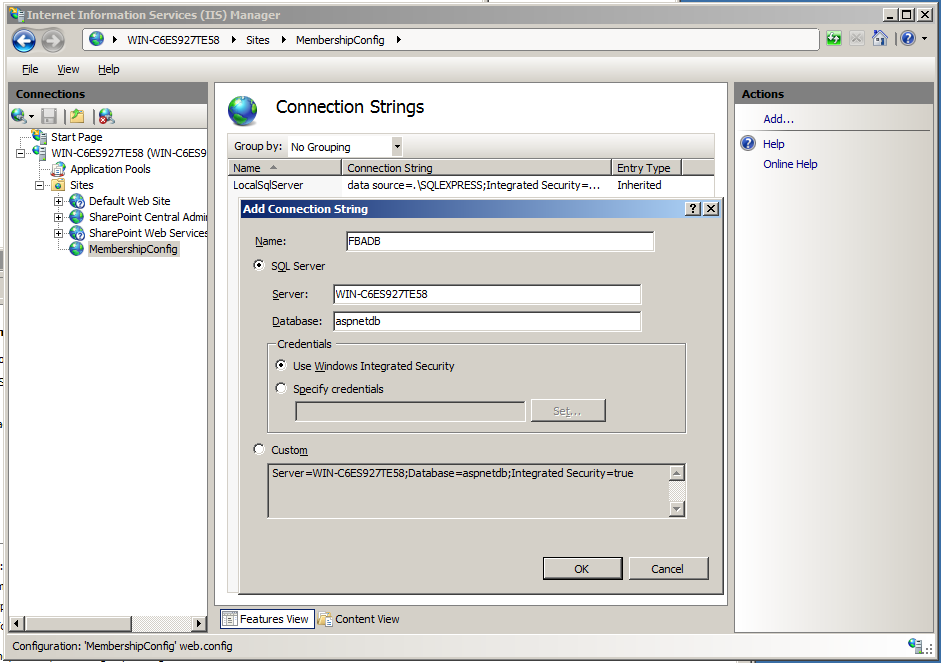
- From the Connection Strings page, click “Add…” on the right side panel. On the Add Connection String dialog that appears, give it a name (I used “FBADB”), enter your server name and enter “aspnetdb” for your database name. Select “Use Windows Integrated Security” and click OK. We’ve now created the database connection.

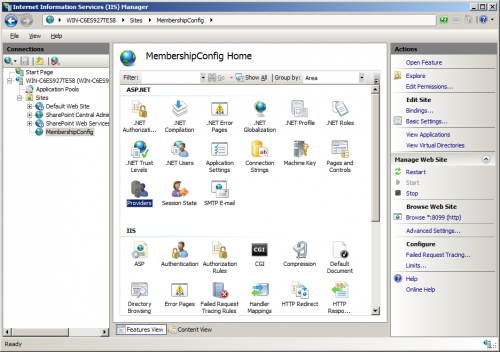
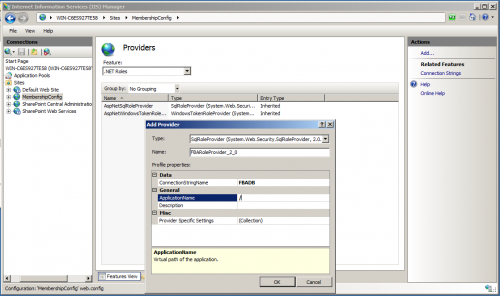
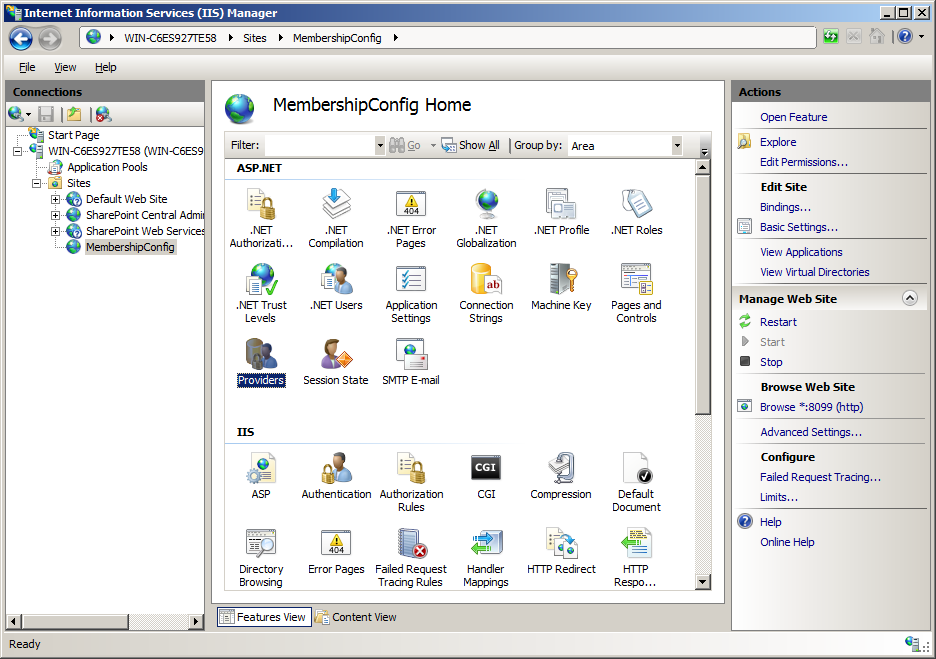
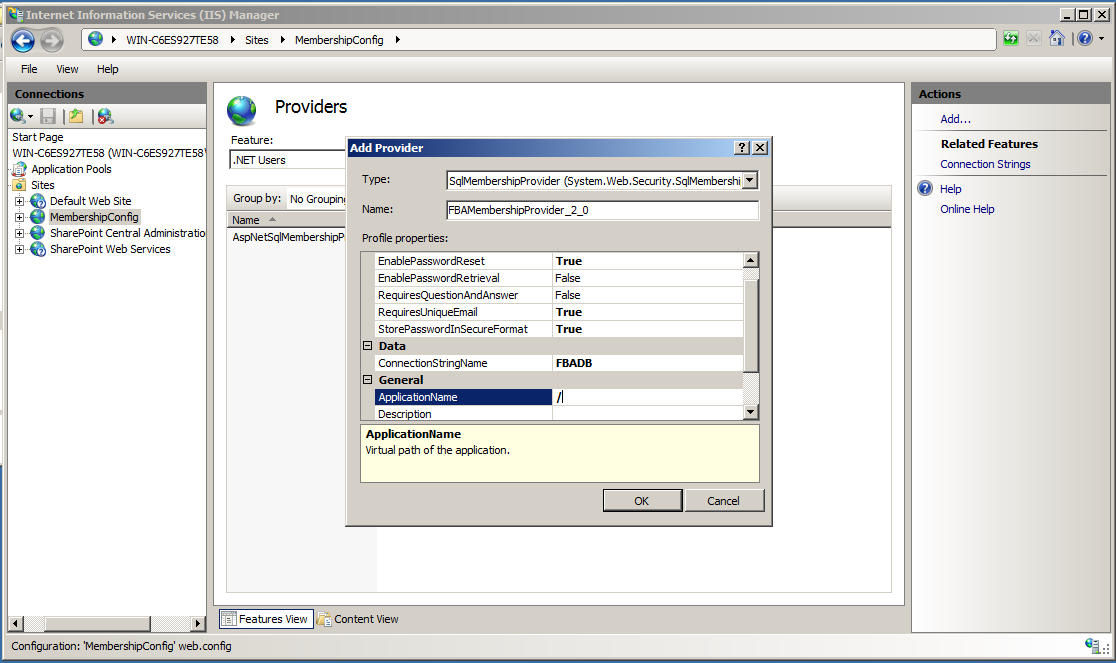
- We’re now going to create the membership provider, that will let us edit users in the membership database. From the site Features view, click “Providers”. (If “Providers”, “.Net Users” and “.Net Roles” is missing from the features view, then the associated application pool is configured for .Net 4.0. Go back and configure it for .Net 2.0).
- From the Providers page, select “.Net Users” under Feature. Click “Add…” in the right side panel. In the dialog that appears, chose “SQLMembershipProvider” for type. Give it a name. For this example I used FBAMembershipProvider_2_0. I added the _2_0 so as not to confuse it with the “FBAMembershipProvider” entry we will be creating when we set it up for SharePoint. Select the different options you want associated with your membership provider. I have some more detail on the options available in the next section when we setup the membership provider for SharePoint. One thing I must stress though is that the options you pick here MUST match the options you use when you setup the membership provider for SharePoint. If they don’t, the users you create here will not work properly.For options, I chose:
Option Value EnablePasswordReset True EnablePasswordRetrieval False RequiresQuestionAndAnswer False RequiresUniqueEmail True StorePasswordInSecureFormat True ConnectionStringName FBADB (This must match the database connection we setup earlier) ApplicationName / Click OK to close the dialog and create the membership provider.

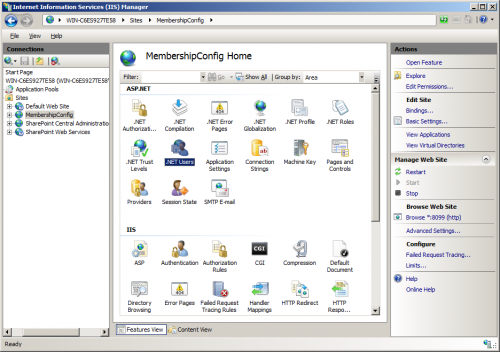
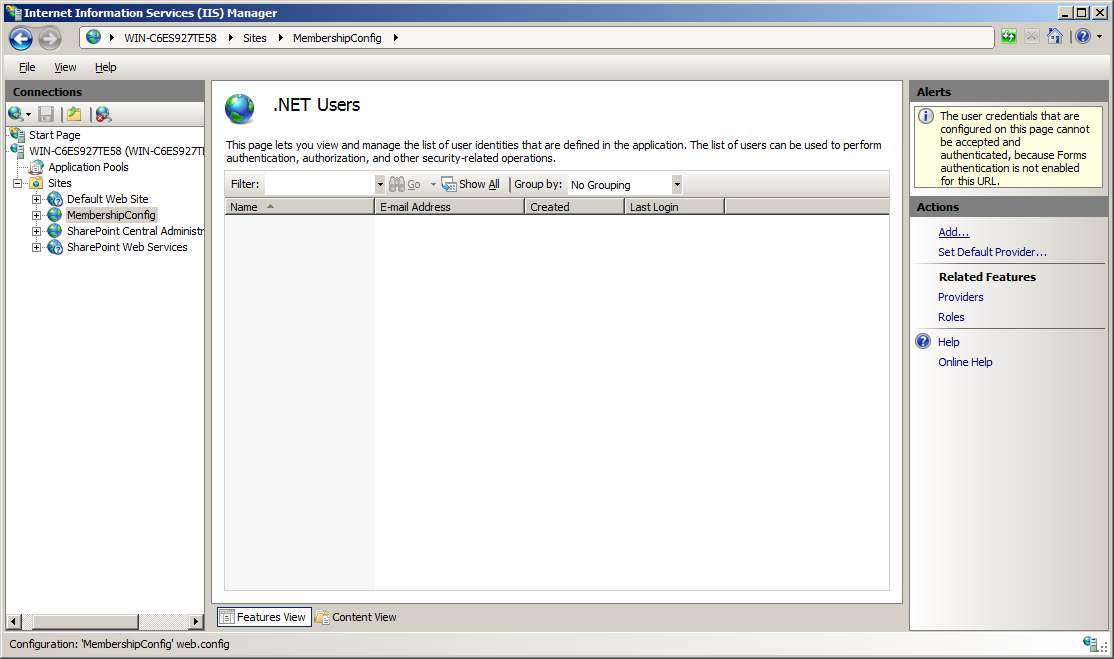
- We’re now going to add users to the membership database. Click “.Net Users” from the Features view.
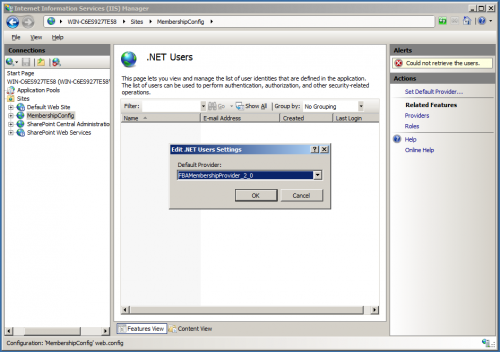
- The first thing we have to do before we can create users is configure the default membership provider. Click “Set Default Provider…” in the right side panel. When the dialog appears, choose the membership provider we just created and click OK.
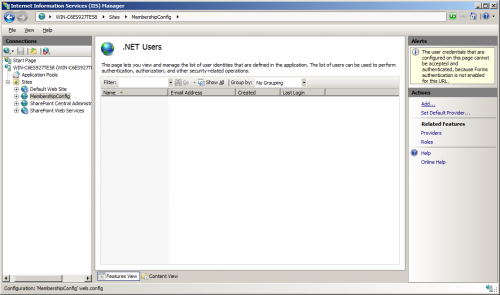
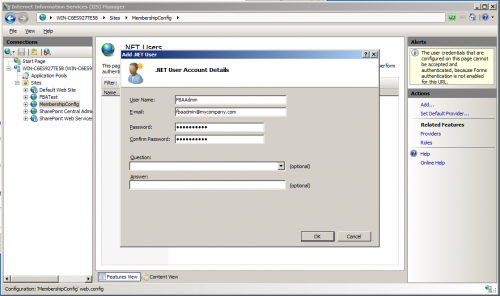
- Now that the default membership provider is selected, we’re presented with an empty .Net Users page, as there are not yet any users in the database. Click “Add…” in the right side panel to add a user.
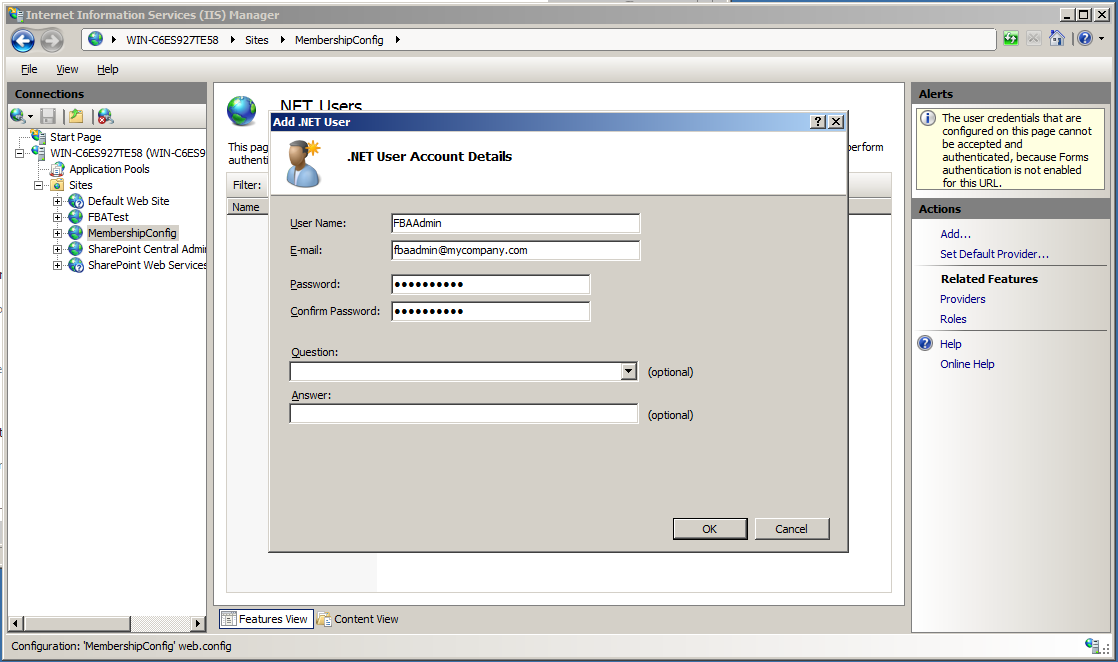
- From the “Add .Net User” dialog, give the user a name, email and password. In this example i’m creating an admin user that i’m going to use as the SharePoint Site Collection administrator.The password needs to be at least 7 characters long and must contain at least 1 non-alphanumeric character. Since we set RequiresQuestionAndAnswer to false when configuring the membership provider, the Question and Answer fields can be left blank.Click OK to create the user and close the dialog.
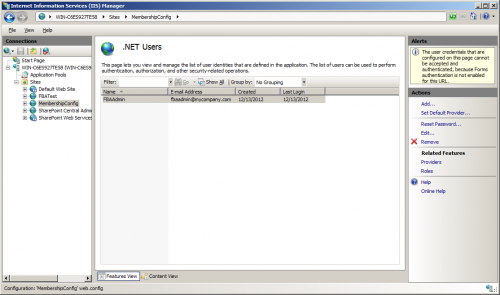
- Now the .Net Users page lists the one user you have created. You can use this page to add and edit users in the future.
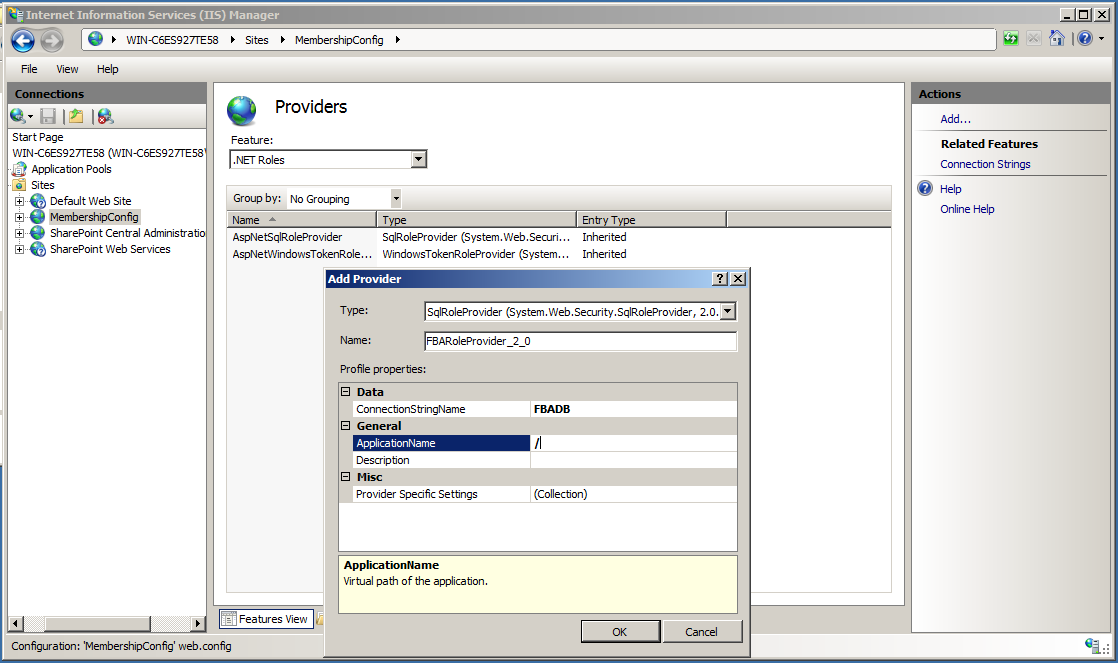
- If you are going to use Roles in SharePoint, you can create a Role provider from the Providers page, and then use the .Net Roles page to add roles – very similar to how we added the membership provider and added users.


Now that we’ve added a user to our membership database, you can continue on to Part 3 to learn how to configure the membership provider for SharePoint.
Leave a Reply